Thursday, August 29, 2013

Pro Tip: Butter Skins

In the wake of a week filled with images of Miley Cyrus wearing some really unattractive outfits (I feel like if she had been wearing clothes that weren't made from pleather or teddy bear pelts, maybe this wouldn't be quite as big of a deal) I thought I'd share something pleasant, innocent, and much less scandalous.  

Although with even less clothes.  Did you think that was possible?

After the bridal shower on Saturday (which was at a friends house who lives by the river), I had a glass of wine or three, and left my truck down there for safe keeping.  We went back the next day just to retrieve it and ended up spending the majority of the day!  Boo was fascinated by the water, and since we hadn't been planning on a swim, and the river is pretty secluded, we let him go all natural.  It was pleasantly cool, in the low 80's, but the water was perfection.

Anyway this has no correlation to my ProTip.

Butter skins.  Use 'em.  Fold your butter wrappers in half and store them in a little container in the fridge.

Use them to grease muffin tins, cake pans, frying pans, whatever.  The muffin tins are my fav because it's much less messy than trying to get the nonstick spray in every angle.  Also you'll save a good bit of cooking spray just by using something you would have tossed out!  Woo hoo!

Enjoy the long weekend, I am headed up yonder North to visit my best friend.  I'll see if I can't find something interesting to report back on.  Like a winery or equal purveyor of trouble.


Wednesday, August 28, 2013

Beach Themed Cake


This is my latest cake creation.  I started pinning like crazy a few months ago and decided I would be the next big thing in cake decorating.  After spending a buncha money at Wally World, I realized that everyone and their mother decorates cakes, and they're all better at it than I am!  After a severe pep talk where I reminded myself that not only do I not have to be the best, but I can also do this gig as a hobby and less as a career, I got back into it.  Sometimes I get over zealous and then disheartened.  But I (with the help of Hubs) usually kick my rear into gear.

So instead of trying super crazy ornate difficult things that I saw done on Pinterest by professionals, I opted to volunteer my very unprofessional services to friends and family.  Every new cake is more practice!  And if nothing else, my son will have some seriously kickass birthday cakes.

Anyway the above cake was for a bridal shower, and although it looks kinda fancy, it's really pretty simple.  And if you're better at icing than I am, you should have no problems!  The candies make it look like I did something incredibly difficult or time consuming, but really it's just a bunch of microwaving and refridgeratoring.

I got my candy forms from a friend who was clearing things out (thanks Cherie!) but you can find them at any cake decorating or craft store.  Don't forget to go local!  That reminder brought to you by the hypocrisy of the Wilton candy melts I bought from Wal Mart.  Life isn't fun without a little double sidedness, guys!
 Toss a few candy melts in a ziploc bag, and microwave 15 seconds at a time, squishing in between turns.  If you get them too hot they will not melt.  They'll actually get more solid.  Snip the corner of your bag off and fill the molds, about halfway or so.  Put them in the fridge for 5-10 minutes, turn the form upside down to pop 'em out and stash them in a ziploc bag until you're ready to use.  My advice would be to start the candy making process a week or so in advance, just doing a batch every time you're hanging out in the kitchen.

The cake itself was pretty easy.  Level off the bottom tier with a cake leveling thingamabob once it cools, and apply a thin coat (crumb coat) of plain white icing on the cake.  I then mixed my Malibu Barbie-esque icing and did a nice happy layer.  After placing and replacing the candies just so, I finally found a way I was happy with, piped well wishes on top and teeny dots around the bottom.  Preeeeeetty simple.

I was also doing cupcakes.  I would highly recommend that you get a pack of icing bags to make all of your cupcake icing forevermore easy, a 2A tip for icing a swirl (as seen above) and a 4 tip for writing.  Buy them individually if you just want the bare minimum of icing necessities, but get a larger pack of tips if you're thinking about doing more experimentation with cake decor.

I put candies on some of my cupcakes but after running out and being too lazy to make more, I drizzled some of the leftover icing across the tops of the others.  I gotta say, I liked the variety.  You could do the drizzle with the melted candies, though, which I didn't consider until later.

Voila!  If you're anything like me, you're going to scrutinize every last inch of the cake.  Just remember that while people may notice it, they're much more interested in eating it.  The bride to be at my shower said it was too pretty to cut, so the groom snuck over and all but smashed it in half with the knife!  Problem solved, haha.


Monday, August 26, 2013

What ARE these?

This is a cry for help.  I'm trying to figure out what the below plants are.  Well, actually, not so much the one on the right.  I learned that it is a Poke Berry, and that you can't eat them.  Which is a dern shame because we have roughly 347 of them growing nearby.  The one on the left, however, is a mystery plant.  It might just be a weed, and I'm definitely not going to eat it or anything, but now I just have to know.

Mystery leaf & fruit (left), Poke berries starting to ripen (right)

I know the fruit looks kind of like a blueberry, but it's larger (almost the size of a nickel) and I kid you not, resembles a tiny blue squash.

This is the inside.  It smells kind of like cucumber?  I have been researching for hours and got nothing!  If you have any ideas, clues, or resources, please send them my way!

Tuesday, August 20, 2013

Artichoke & Smoked Salmon Pizza


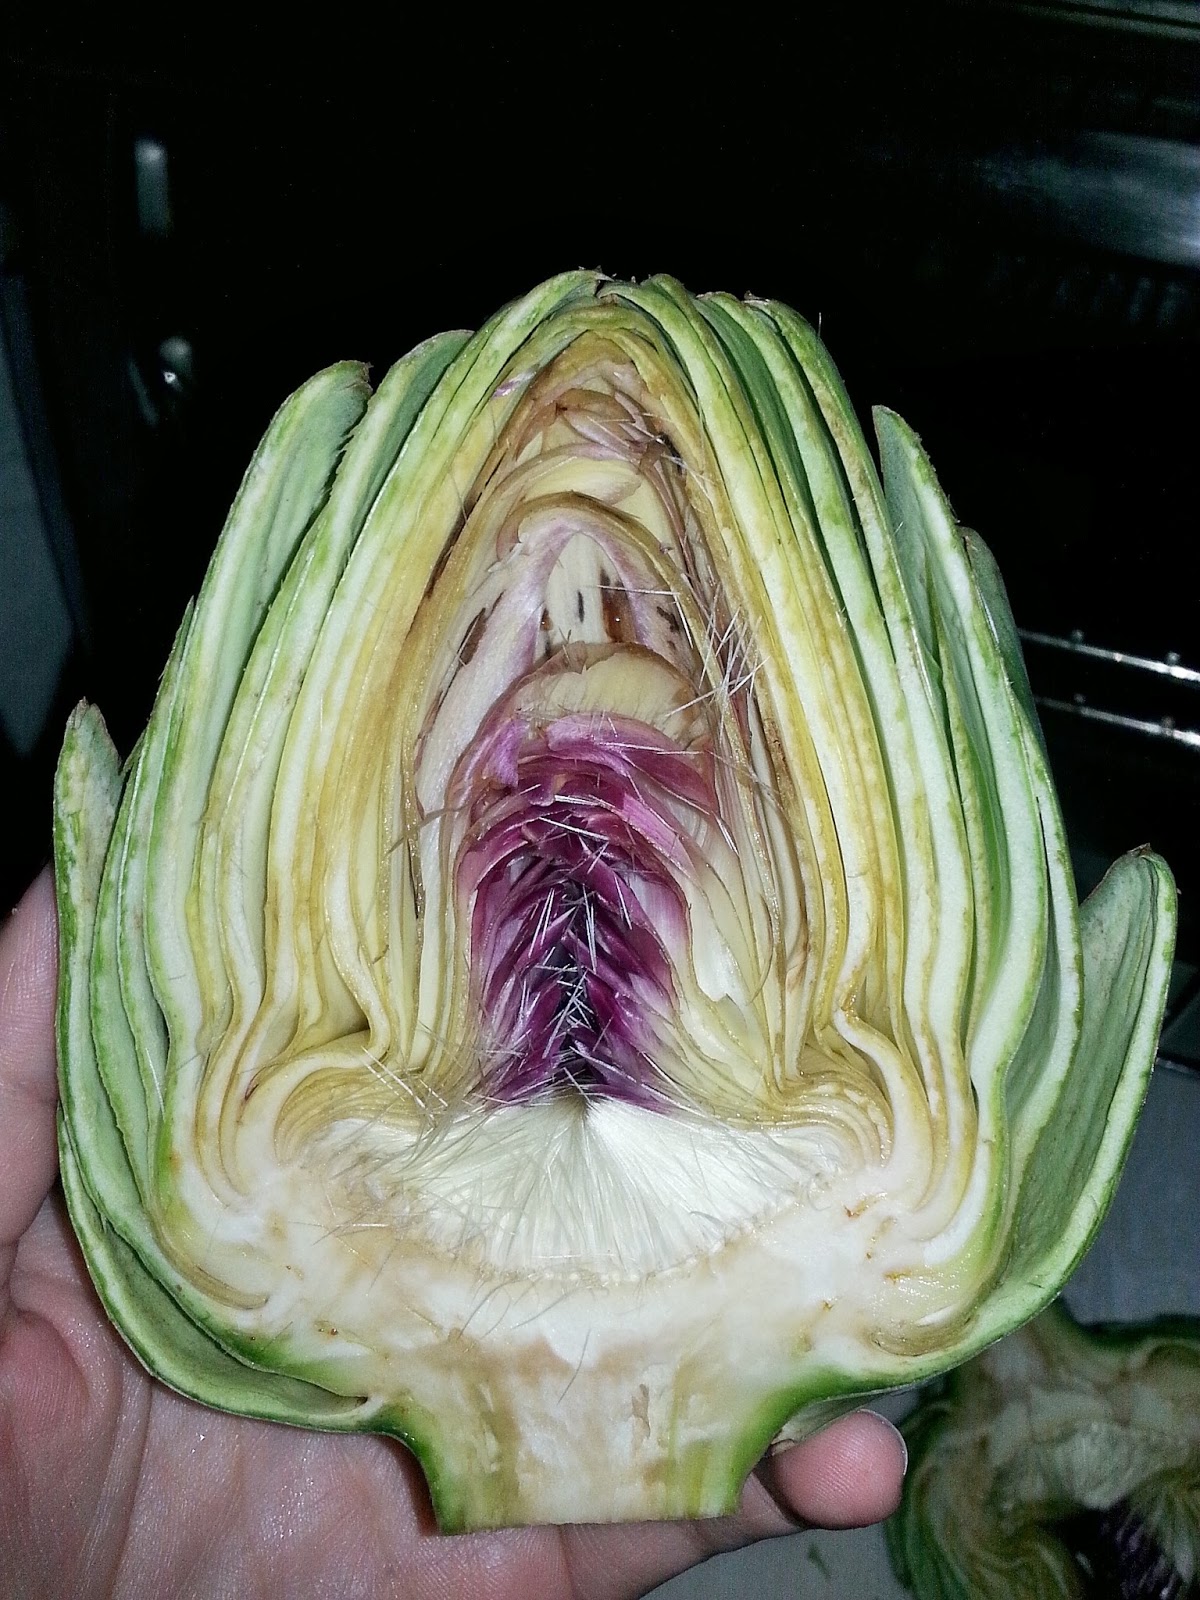
Yesterday was Monday in full force.  It was dreary, dull, and I was unmotivated and blue.  But at the end of the day I decided to treat myself to something delectable to make up for it.  I combined two recipes to make an artichoke, sun dried tomato, and smoked salmon pizza.

First of all, did you know how pretty artichokes are?  Now fyi, I totally winged what to do with said artichoke.  I mean I had a recipe on how to steam them, but as far as what to trim, and what to cut, I am a doofus.  I sliced mine in half and cut off the top inch or so.

Place them face down in a bowl with some lemon slices, thyme, and equal parts olive oil to white wine.  (The recipe called for 1/3 of a cup each for 2 artichokes, so I adjusted accordingly.)  Cover and microwave for 10 minutes per artichoke.  We nibbled at the leaves and I spooned out the center for my pizza.

Drizzle the liquid over the pizza crust, and place the smoked salmon, sun dried tomatoes, and artichokes around.  Sprinkle mozzarella sparingly and toast for 10-15 minutes at 350.  Then drink the rest of your bottle of white wine, watch some Mad Men, and go to bed.

Wednesday, August 14, 2013

Candied Jalapenos...Ole!


In my seemingly eternal search to find practical uses for jalapenos, I have stumbled across the heavenly candied versions.  I am really quite crazy about them.  If you don't believe me, there will later be a post outlining all of the scrumptious uses for these toasty tasty treats!  

Candied Jalapenos:
-A bunch of jalapenos (I think I had 3 or 4 pounds?)
-2 cups cider vinegar
-6 cups sugar
-spices*, about 1-2 tsp of each
*(play around!  This time I did red pepper flake, onion flake, and garlic powder, last time I did the more traditional turmeric, celery seed, mustard seed, and garlic cloves.  The jalapenos are so hot that it would be very difficult to overpower their flavor.)

1.  Slice the jalapenos (and don't breathe, blink, or touch anything).  You can leave all the seeds in and try not to die, or remove all of them, or do like I did, and dunk the slices in water, and some of the seeds will slice and fall to the bottom.
2.  Bring vinegar, sugar, and spices to a boil, add the jalapenos and bring the pot back up to a boil.
3.  Remove jalapenos with a slotted spoon, placing in a bowl and set to the side.  Bring vinegar mixture to a rolling boil and leave for about 10 minutes.  
4.  At this point you can re-combine the peppers and syrup and stick in the jars, or put the peppers directly into the jars and pour the syrup over them, depending on your preference.  Leave 1/4" headspace and process in boiling water bath for 10 minutes.


On a side note.

The person who invented the phrase "What doesn't kill you makes you stronger" was not talking about jalapenos.  If they had been, the saying would go "What doesn't kill you makes you want to die."

Keep that in mind.  I kept getting choked up and sneezing as if I were allergic to the things.  Think it was just my body trying to exorcise the demons.

Bring the vinegar to a boil & dice/seed jalapenos.

Bring the jalapenos to a boil and then remove.

The long boiling time allows the vinegar mixture to become syrupy.  If you want the sauce to be less thin, try boiling for about 5-6 minutes instead.


Ta dah!  These suckers are so hot, but sooooo tasty.

Sunday, August 11, 2013

Diced 'Maters

Boo chowing on a 'mater and bravely considering a jalapeno.

A few weeks ago I was complaining commenting on how many cucumbers our garden had yielded this year.  If I had only known what was headed my way...

Tomatoes.  Hundreds of 'em.  Every other day it seems like, I get a fresh grocery bag of tomatoes from the garden.  I am up to my eyeballs in tomatoes!  This change of pace is bittersweet.  In my mind, tomatoes are a much more versatile option for canning.  I could make at least a dozen different dinners based off of canned tomatoes alone, and then there's spaghetti sauce, pizza sauce, sloppy joe mix, chili base, etc.  The bitter in this sweetness is the fact that tomatoes are a real bitch to deal with.  The extra steps of boiling them for a few minutes and dunking them in ice water so that you may then strip their skins off (not to mention the additional dirty dishes) is a pain in my rump.  

Not only that, but on top of all of the intended ones, we've had several surprise tomato plants spring up on us!  There's one around several of the fruit trees in our backyard from when we spread compost at the beginning of the season, not to mention one that is literally as tall as me growing out of our compost pile.  Another great reason to compost!!

*Sigh*  I don't mean to sound ungrateful.  I am quite happy (and impressed...you go Hubs!) with the bountiful harvest we have received.  The vast majority of our tomatoes have ended up being Romas, even though we planted them equally alongside beefsteak, cherries, and vine tomatoes.  Go fig.  So far I've tackled two batches of 'maters and will be starting a third tomorrow.  There is going to be so much chili in my future.  My love of everything Autumn keeps me motivated.

I love this site.  It's simple, to the point, and just doesn't church anything up, which I'm all about.  I used their process to do some diced tomatoes.  I had, oh, I dunno, about a zillion of 'em, and ended up making 8 or 9 pints.
My tomatoes, sans skins.

Right, so I uh, didn't have any bottled lemon juice.  A few months ago there were a bajillion limes on sale, and I juiced and froze some.  So I put a cube in each jar, and a teaspoon of canning salt. 

 I ended up not dicing my tomatoes and instead throwing the smaller ones in whole, and pulling the larger ones apart with my fingers.  I threw them in a stock pot, added enough water to cover, and boiled them for five minutes.  This is what it looked afterwards.

Packed into hot, sterilized jars.

I chose the option of pressure canning my tomatoes.  Because of their acidity, they're safe to water bathe as well.  They have to stay in the water bath for 40 minutes, while in the canner they only take 15.  Really, though, it's all in whatever you're comfortable with.

The beauties!

[8/2/14 Edit]- When I made these tomatoes, I thought the three or four batches I did would last me all year!  In reality, they were gone by October.  You would be utterly amazed how quickly you'll go through a stockpile of home canned tomatoes.  They make everything taste so much better that you'll want to make chili or sloppy joes twice a week!

Saturday, August 10, 2013

Backyard Discoveries

Check this out.  These bad boys are all blackberries.  I noticed them while picking blueberries in the neighbors' yard.  When I mentioned to them that they had a wall of berries, they were shocked, having no clue that they existed!  So I went to pick.  Although there were many berries, there were also many spiders and thorns.  

And I'm a wuss.  

So I only managed to pick a small bowl-full, but there was enough to make jam.  Since I decided to make do only with what I gathered, I checked Ball's pectin calculator to find a recipe.  In the end, I decided that I didn't really want to go the pectin route, but luckily I ran into this generalized chart for jam making.  

I do a lot of recipe adjusting in order to fit the amount of ingredients I already have.  I know you're not really supposed to, but hey what can I say?  I'm just a rebel, baby.  Anyway the chart calls for equal parts berries and sugar, so it was a pretty simple modification.  As I remember, I had about 3/4 of a cup of crushed blackberries, but I made a full cup by adding some blueberries.  

I had a pretty small yield, two not quite full jars.  And of course I took one of the jars to the neighbors, as that seemed only fair.  I finally got around to trying this today, and it was actually very good.  I definitely overcooked it, which is easy to do in such a small batch, but it wasn't ruined.  The seeds are in there which is only moderately annoying.  I think I'd probably strain those out next time.

Oh, and there will be a next time.  I'm sicking Hubs on those spiders next year man.  No eight-legged spawn of Satan is going to keep me from delicious jams and preserves!  Well, at least not as long as I've got my knight in shining armor (or dork in tin foil) around to ward them off...


Friday, August 9, 2013

Homemade Tomato Soup

I've never been a huge fan of tomato soup.  I mean, sure, throw some grilled cheese triangles next to it and I'll probably eat some.  But the canned stuff?  It's just not THAT great.  This, however, is an incredible alternative!  
Finely dice a couple carrots, an onion, some garlic, and saute for a while (10-20 min.) until mostly tender.  (Isn't it pretty?  Smelled great too!)

Thursday, August 8, 2013

Canning Jars on Sale!!!

This is less a blog post and more a PSA.  I just went in to my *ahem* Neighborhood Ace Hardware, and found that a crap ton of their canning supplies are on sale.

Every Ace is different, but this was the deal at ours.  At least one of each size of jars were on sale, but the best deal I saw was 12 packs of pint jars on sale for $7.  Needless to say, those jars are long gone, but my store ordered two cases specifically for me that I can pick up on Monday at the sale price.  The tags said the sales would continue until August 31st, so I may be getting a lot more than two cases in the long run.  What a great size too!

Anyway, if I come across any other great deals on goodies, I will keep you all posted!

Tuesday, August 6, 2013

Texas Rockets 7 Ways

 Jalapenos.  Always a bountiful harvest.  But what to do with all of them?  Certainly you can use them as a garnishment, a condiment, a torture device, etc.  Personally we enjoy the time honored tradition of Texas Rockets.  Tonight I was feeling adventurous, so I decided to jam the suckers full of all kinds of things.  Here's what I did.  (Above) Slice them open and remove seeds/membranes.  Leave a few if you're feeling particularly brave.

Stuff them full of stuff.  Here I have some diced candied jalapenos...

...and cream cheese.  Cream cheese + jalapenos is pretty much always a winner.

I took some breakfast sausage and microwaved it for 20-30 seconds.  It doesn't have to be completely done, as it will continue cooking in the jalapeno.  You just want to get the pink off of it.  I mixed in some cheddar cheese and stirred it up.

Before and after.  We usually do them on the grill, but I was being lazy tonight.  These were in the toaster oven at 450 for about 15 minutes.  Flip 'em once.


Here's some of the ideas we tried.

NC Rocket- Stuffed with NC bbq and wrapped in bacon
Carnivore Rocket- Stuffed with sausage and cheese, wrapped in bacon
Rocket & Lox- Stuffed with cream cheese and smoked salmon or stuffed with cream cheese and wrapped in salmon (we tried two ways and enjoyed both, though I think I liked the wrapped one better)
Death Rocket- Stuffed with cream cheese and candied jalapenos, wrapped in bacon
Queso Rocket- Stuffed with cream cheese and cheddar, wrapped in bacon
Traditional- Stuffed with cream cheese, chicken, salt, pepper, and wrapped in bacon
Lazy Rocket-  Just the cream cheese and bacon.  I didn't have any chicken.  Lazy.

Well, we really enjoyed all of them.  Hubs loved the lox, death rocket, and NC rocket especially.  Make a bunch though, we went through them with a quickness.

Also, please share if you have a different recipe you go by!  I'd love to hear them.

Thanksgiving in July


I love Autumn!  Love it.  There are so many wonderful things about it:  crisp evenings, Halloween, pumpkin patches, sweater weather (I'm a sweater junkie), flannel pj's, apple cider.  Oh heavens, I could go on!  Keep your Summer, I'll take Fall.  

Hang on.

Okay, now that I'm sitting on my couch in flannel and drinking some apple cider, I feel 3,000,000 times better.  Anyway, every once in a while, Hubs brings home a turkey from work.  At this point I don't really ask questions anymore, I just start meal planning.  

Normally I am not big on turkey.  I have actually been known to skip it on several Thanksgivings.  It's usually kind of dry, kind of bland, kind of turkeyish.  I've tried several different recipes, including the no longer 'safe' route of slow roasting it, but still get a papery-dry meat log.  Anyway I found a recipe for the perfect roast turkey, and figured I'd give it a shot.

Guys...do this.  Every time.

Slather it in butter!  Hubs looooves butter.  I had to send him a pic of this, it uses a whole stick!

I seasoned mine pretty heavily with the mindset that most of the seasonings would slide off with the melting butter.  I used salt, pepper, and seasoning salt.

This is normal box stuffing, but it was still delish.  Basically all you do is put a few cups of turkey/chicken broth in the bottom of the pan, and baste it in the juices ever 30 minutes.  Put a tin foil tent on it for the first hour and a half. (I ended up having to put mine back on as the turkey was getting extra crispy)

After the first 30 minutes.

After the last 30 minutes.

This was the juiciest, tastiest turkey I've ever had!  I served it with a butternut gorgonzola casserole, stuffing, and hey, remember that orange failberry jam?  Makes an intriguing substitution for cranberry sauce.  Anyway I highly suggest giving this a shot come November (or before)!

Sunday, August 4, 2013

Dinosaur Dung? (DIY Fertilizer)


We use a lot of grass clippings, either for piling around our trees, lining our garden,  or for sprinkling on top of our compost pile.  The guy who gives us a hand in the yard always brings us the spare he picks up along the way.  One week when he brought some, we were rather busy with getting a new roof put on.  The next week was Boo's first birthday, (and also Cinco de Mayo) so we were somewhat busy.  All told, these two bags of grass clippings sat inside their trash bags, in good ol' NC heat and humidity for about three weeks.   When we finally got around to dumping them out, this is what they looked like.

"That looks like a big old dinosaur shit." Is what our help said.  We didn't exactly disagree.

Either way, we spread it around our trees and garden as usual, mixing it in with some slightly fresher grass.  Our plants loved it.  I found out that this is a scientifically proven way of making your own fertilizer.  For free.  Think of it as Vegan Fertilizer. A great way to keep your garden organic, from the start.

A little gardening hack, just for you!

Oh, my Poose.

The other night, Hubs woke up, rolled over and started talking to me.  He thought I had just come to bed, but really I had been asleep next to him for a few hours and was completely incoherent.  During our conversation, I asked him if he had read my blog post about Poose.  He said no.  An hour later he woke up, turned to me, and said "You wrote a blog post about Poose?!?"  

None of which I remember.  But either way, I am now destined to write one.


Meet Poose.

Poose is a sweet, shy, and crazy-faced 2 year old grey tuxedo kitty.  She has the fluffiest fur that has ever been and grooms relentlessly.  

We found Poose's mother on our front porch one morning sleeping in a McDonald's bag.  Hubs opened the front door and she walked in like she owned the place.  Five days later she had kittens in our storage room upstairs.  Thanks lady!  

There were four kittens, one black, two tuxedos, and one little grey tuxedo.  She was the only shy one. Her first 'name' was actually Socially Awkward Kitten, because she just didn't want anything to do with us.  Needless to say, we weren't exactly over the moon for her at first.  It's kind of hard to love something that wants nothing to do with you.

Well we found homes for the other two kittens, and a big farm for the momma kitty to go to (she was not satisfied with being indoors), but nobody seemed to be able to keep sweet little Poose.  We got "stuck" with her, as we often joked, but find it a blessing in disguise, as she has turned out to be a sweet pea.  She and big brother Jumbo still grace us with their presence.

Likes:  Spinach, turkey
Dislikes:  Sweaters, car rides
Personality:  Talkative, she'll talk back to you as long as you talk to her.

Anyway, now Hubs will be happy, and Poose will be exalted in the manner she should be.  You know, cat worship and all that.  Maybe someday I'll introduce you to His Royal Majesty, Jumbo...


Thursday, August 1, 2013

5 Minute Peach Salsa

I looooove Mexican food.  Quesadillas, pork carnitas, chilaquiles, tacos al pastor...it doesn't really matter to me.  If it's on the menu, I'll try it.  This is a somewhat recent love, as for many years my knowledge of this cuisine was limited to tacos.

The tacos I ate growing up were kind of Americanized.  Course, this was in a time where there wasn't any local Mexican cuisine, so we didn't have very much to go off of.  We would eat ground beef with taco seasoning, chopped lettuce and tomatoes, shredded cheese, and salsa from the jar.  But look, hear me now,  I am not hating (Mom). I'm merely describing how we did it back then.  And we loved it!

But when I first started to realize how much I enjoy cooking, I decided to amp up taco night.  I made chicken tacos instead of beef, with warm corn tortillas.  When I was looking for an alternative to the typical salsa, I got the idea to coarsely chop some yummy vegetables and go from there.

Ever since then, Hubs and I have used this pico de gallo instead of salsa.  The great thing about it is that after a few hours in the fridge, the tomatoes will start to release their juice, and it will turn into a very loose, al fresca style salsa.  If you like a more traditional style salsa, then plan on making this a few hours ahead of time.  Either way the flavor is pretty intense.

There isn't really a recipe per se, but I'll guide you through it as best I can.  This was for a relatively small batch, enough for two people.

I used about 1/4 of a peach, diced into chunks.  I then ran a knife through it once or twice, just enough to ensure that the pieces were of no uniform size.

My peach wasn't super ripe, so I sprinkled one good pinch of sugar over it and let it sit.  Chop enough onions (sweet or red) so that it equals the amount of peaches.  Squeeze half of a lime over the mixture.

Dice 3-4 small tomatoes (I used roma) and toss them in, complete with juices and seeds.  Chop cilantro to taste.  The amount above is somewhat on the excessive side, but I love the flavor!

Dice a jalapeno very very finely and combine.  If you don't like heat, I would still encourage the addition of the jalapeno for flavor, just be sure to remove any and all seeds and membranes.  And be sure to wear gloves and wash your hands afterwards.  If you're terrified of jalapenos, consider tossing a wee bit of bell pepper in.  Sprinkle a small pinch of salt over top, and stir everything up.

You can enjoy it now, or stick it in the fridge for a few hours so that the flavors can meld.

Peach Salsa 

-1 part peach
-1 part onion
-2 parts tomatoes
-jalapeno/bell pepper
-cilantro
-pinch of sugar (if peach is not ripe)
-pinch of salt
-juice from 1/2 a lime

1.  Dice the first 5 ingredients and combine with the rest.  Stir up (or be lazy and shake it up in a tupperware container like I did) and enjoy!


One last note, if you take out the peach and sugar, you have a great pico/salsa recipe.  Consider enjoying this on your favorite mexican food, or just with chips.  We have also mixed in sour cream before to make an incredible dipping sauce for quesadillas!