Thursday, August 29, 2013

Pro Tip: Butter Skins

In the wake of a week filled with images of Miley Cyrus wearing some really unattractive outfits (I feel like if she had been wearing clothes that weren't made from pleather or teddy bear pelts, maybe this wouldn't be quite as big of a deal) I thought I'd share something pleasant, innocent, and much less scandalous.  

Although with even less clothes.  Did you think that was possible?

After the bridal shower on Saturday (which was at a friends house who lives by the river), I had a glass of wine or three, and left my truck down there for safe keeping.  We went back the next day just to retrieve it and ended up spending the majority of the day!  Boo was fascinated by the water, and since we hadn't been planning on a swim, and the river is pretty secluded, we let him go all natural.  It was pleasantly cool, in the low 80's, but the water was perfection.

Anyway this has no correlation to my ProTip.

Butter skins.  Use 'em.  Fold your butter wrappers in half and store them in a little container in the fridge.

Use them to grease muffin tins, cake pans, frying pans, whatever.  The muffin tins are my fav because it's much less messy than trying to get the nonstick spray in every angle.  Also you'll save a good bit of cooking spray just by using something you would have tossed out!  Woo hoo!

Enjoy the long weekend, I am headed up yonder North to visit my best friend.  I'll see if I can't find something interesting to report back on.  Like a winery or equal purveyor of trouble.


Wednesday, August 28, 2013

Beach Themed Cake


This is my latest cake creation.  I started pinning like crazy a few months ago and decided I would be the next big thing in cake decorating.  After spending a buncha money at Wally World, I realized that everyone and their mother decorates cakes, and they're all better at it than I am!  After a severe pep talk where I reminded myself that not only do I not have to be the best, but I can also do this gig as a hobby and less as a career, I got back into it.  Sometimes I get over zealous and then disheartened.  But I (with the help of Hubs) usually kick my rear into gear.

So instead of trying super crazy ornate difficult things that I saw done on Pinterest by professionals, I opted to volunteer my very unprofessional services to friends and family.  Every new cake is more practice!  And if nothing else, my son will have some seriously kickass birthday cakes.

Anyway the above cake was for a bridal shower, and although it looks kinda fancy, it's really pretty simple.  And if you're better at icing than I am, you should have no problems!  The candies make it look like I did something incredibly difficult or time consuming, but really it's just a bunch of microwaving and refridgeratoring.

I got my candy forms from a friend who was clearing things out (thanks Cherie!) but you can find them at any cake decorating or craft store.  Don't forget to go local!  That reminder brought to you by the hypocrisy of the Wilton candy melts I bought from Wal Mart.  Life isn't fun without a little double sidedness, guys!
 Toss a few candy melts in a ziploc bag, and microwave 15 seconds at a time, squishing in between turns.  If you get them too hot they will not melt.  They'll actually get more solid.  Snip the corner of your bag off and fill the molds, about halfway or so.  Put them in the fridge for 5-10 minutes, turn the form upside down to pop 'em out and stash them in a ziploc bag until you're ready to use.  My advice would be to start the candy making process a week or so in advance, just doing a batch every time you're hanging out in the kitchen.

The cake itself was pretty easy.  Level off the bottom tier with a cake leveling thingamabob once it cools, and apply a thin coat (crumb coat) of plain white icing on the cake.  I then mixed my Malibu Barbie-esque icing and did a nice happy layer.  After placing and replacing the candies just so, I finally found a way I was happy with, piped well wishes on top and teeny dots around the bottom.  Preeeeeetty simple.

I was also doing cupcakes.  I would highly recommend that you get a pack of icing bags to make all of your cupcake icing forevermore easy, a 2A tip for icing a swirl (as seen above) and a 4 tip for writing.  Buy them individually if you just want the bare minimum of icing necessities, but get a larger pack of tips if you're thinking about doing more experimentation with cake decor.

I put candies on some of my cupcakes but after running out and being too lazy to make more, I drizzled some of the leftover icing across the tops of the others.  I gotta say, I liked the variety.  You could do the drizzle with the melted candies, though, which I didn't consider until later.

Voila!  If you're anything like me, you're going to scrutinize every last inch of the cake.  Just remember that while people may notice it, they're much more interested in eating it.  The bride to be at my shower said it was too pretty to cut, so the groom snuck over and all but smashed it in half with the knife!  Problem solved, haha.


Monday, August 26, 2013

What ARE these?

This is a cry for help.  I'm trying to figure out what the below plants are.  Well, actually, not so much the one on the right.  I learned that it is a Poke Berry, and that you can't eat them.  Which is a dern shame because we have roughly 347 of them growing nearby.  The one on the left, however, is a mystery plant.  It might just be a weed, and I'm definitely not going to eat it or anything, but now I just have to know.

Mystery leaf & fruit (left), Poke berries starting to ripen (right)

I know the fruit looks kind of like a blueberry, but it's larger (almost the size of a nickel) and I kid you not, resembles a tiny blue squash.

This is the inside.  It smells kind of like cucumber?  I have been researching for hours and got nothing!  If you have any ideas, clues, or resources, please send them my way!

Tuesday, August 20, 2013

Artichoke & Smoked Salmon Pizza


Yesterday was Monday in full force.  It was dreary, dull, and I was unmotivated and blue.  But at the end of the day I decided to treat myself to something delectable to make up for it.  I combined two recipes to make an artichoke, sun dried tomato, and smoked salmon pizza.

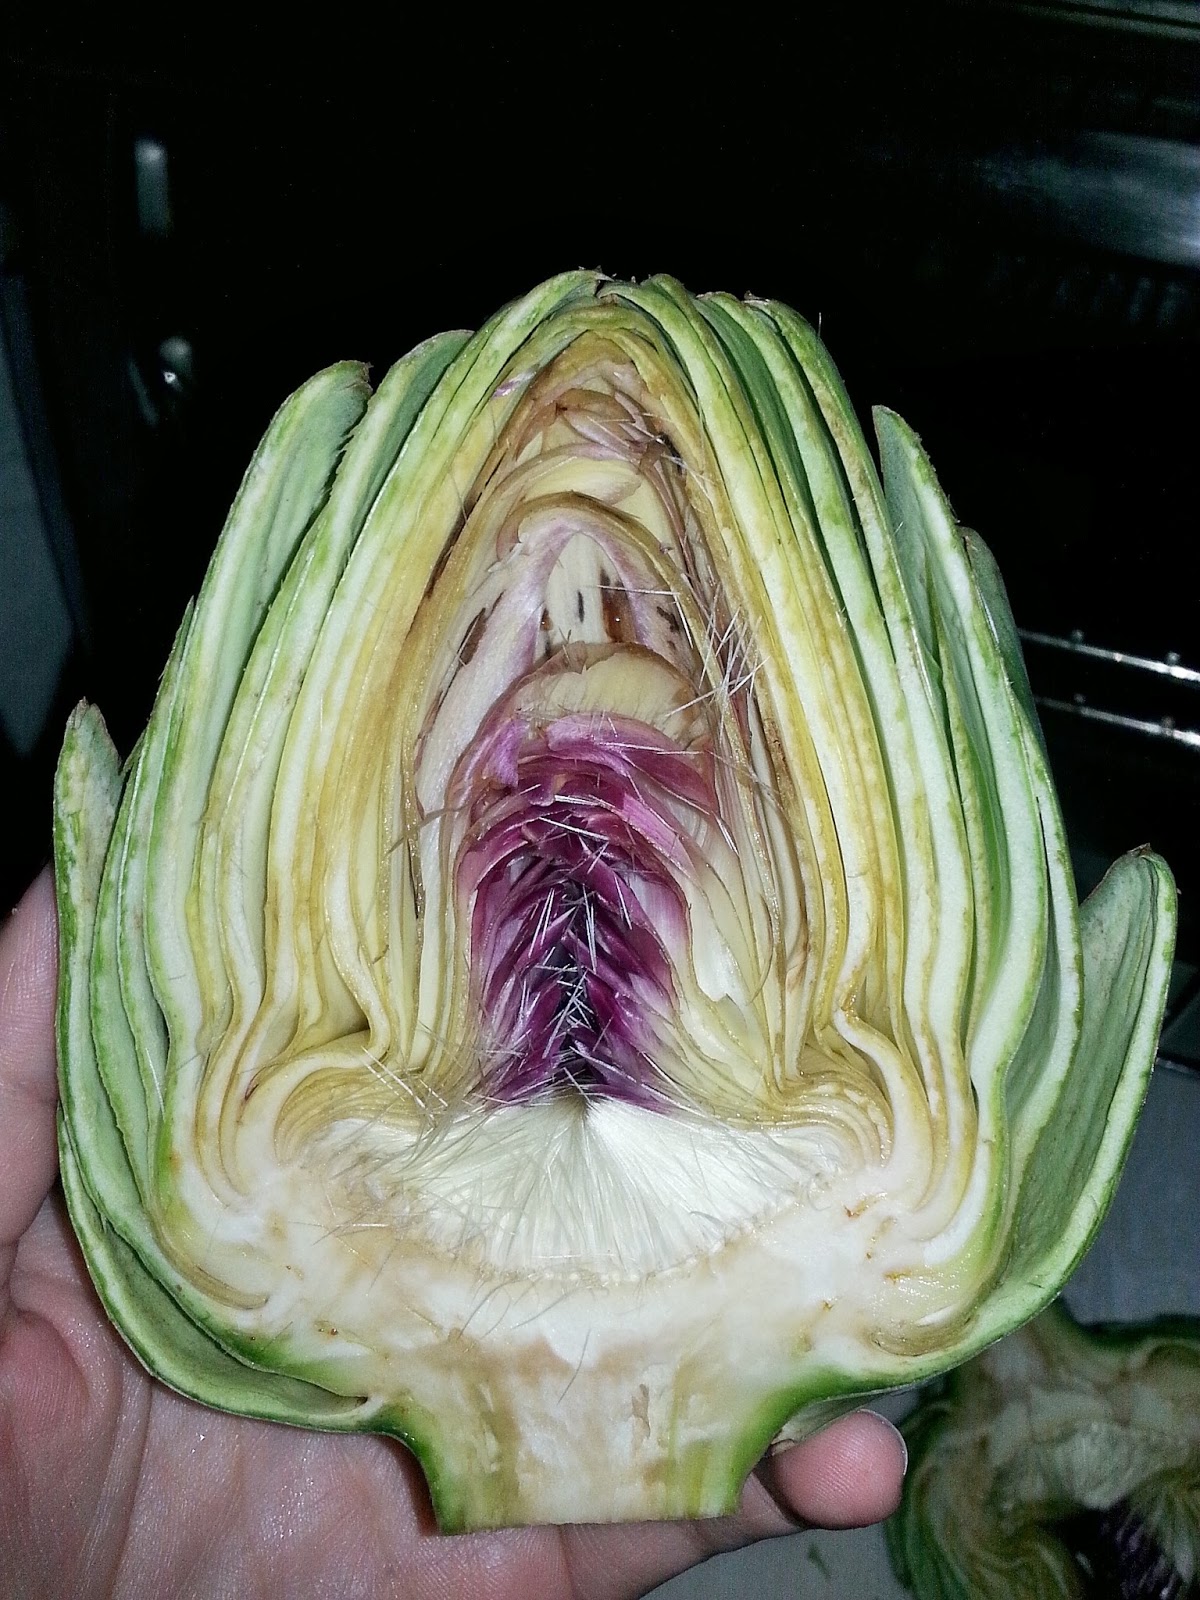
First of all, did you know how pretty artichokes are?  Now fyi, I totally winged what to do with said artichoke.  I mean I had a recipe on how to steam them, but as far as what to trim, and what to cut, I am a doofus.  I sliced mine in half and cut off the top inch or so.

Place them face down in a bowl with some lemon slices, thyme, and equal parts olive oil to white wine.  (The recipe called for 1/3 of a cup each for 2 artichokes, so I adjusted accordingly.)  Cover and microwave for 10 minutes per artichoke.  We nibbled at the leaves and I spooned out the center for my pizza.

Drizzle the liquid over the pizza crust, and place the smoked salmon, sun dried tomatoes, and artichokes around.  Sprinkle mozzarella sparingly and toast for 10-15 minutes at 350.  Then drink the rest of your bottle of white wine, watch some Mad Men, and go to bed.

Wednesday, August 14, 2013

Candied Jalapenos...Ole!


In my seemingly eternal search to find practical uses for jalapenos, I have stumbled across the heavenly candied versions.  I am really quite crazy about them.  If you don't believe me, there will later be a post outlining all of the scrumptious uses for these toasty tasty treats!  

Candied Jalapenos:
-A bunch of jalapenos (I think I had 3 or 4 pounds?)
-2 cups cider vinegar
-6 cups sugar
-spices*, about 1-2 tsp of each
*(play around!  This time I did red pepper flake, onion flake, and garlic powder, last time I did the more traditional turmeric, celery seed, mustard seed, and garlic cloves.  The jalapenos are so hot that it would be very difficult to overpower their flavor.)

1.  Slice the jalapenos (and don't breathe, blink, or touch anything).  You can leave all the seeds in and try not to die, or remove all of them, or do like I did, and dunk the slices in water, and some of the seeds will slice and fall to the bottom.
2.  Bring vinegar, sugar, and spices to a boil, add the jalapenos and bring the pot back up to a boil.
3.  Remove jalapenos with a slotted spoon, placing in a bowl and set to the side.  Bring vinegar mixture to a rolling boil and leave for about 10 minutes.  
4.  At this point you can re-combine the peppers and syrup and stick in the jars, or put the peppers directly into the jars and pour the syrup over them, depending on your preference.  Leave 1/4" headspace and process in boiling water bath for 10 minutes.


On a side note.

The person who invented the phrase "What doesn't kill you makes you stronger" was not talking about jalapenos.  If they had been, the saying would go "What doesn't kill you makes you want to die."

Keep that in mind.  I kept getting choked up and sneezing as if I were allergic to the things.  Think it was just my body trying to exorcise the demons.

Bring the vinegar to a boil & dice/seed jalapenos.

Bring the jalapenos to a boil and then remove.

The long boiling time allows the vinegar mixture to become syrupy.  If you want the sauce to be less thin, try boiling for about 5-6 minutes instead.


Ta dah!  These suckers are so hot, but sooooo tasty.